The Users section in DIMA gives you a central place to manage who has access to your instance. From here, you can review existing accounts, track their status, and control access as needed.
Access
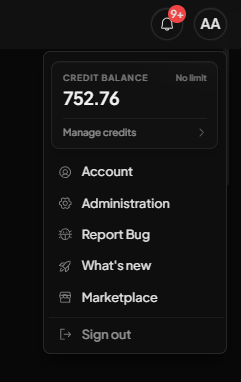
The User setings can be found in the Administration section which is accesible from the User icon in the top-right corner of the screen. Click the icon to open the dropdown menu, then select the Administration tab, which is the second option.
ACTIVE USERS
It is designed to keep user management simple and organized, while helping you maintain a clear view of invitations, roles, and account activity across the workspace.
- Users list: This area shows the accounts connected to the instance, along with their email, role, status, and activity details.
- Invite User: Use this button to open the invitation flow and add a new user to the instance.
- Revoke action: This option lets you remove an invitation or access when a user should no longer have entry to the instance.

INVITE USERS
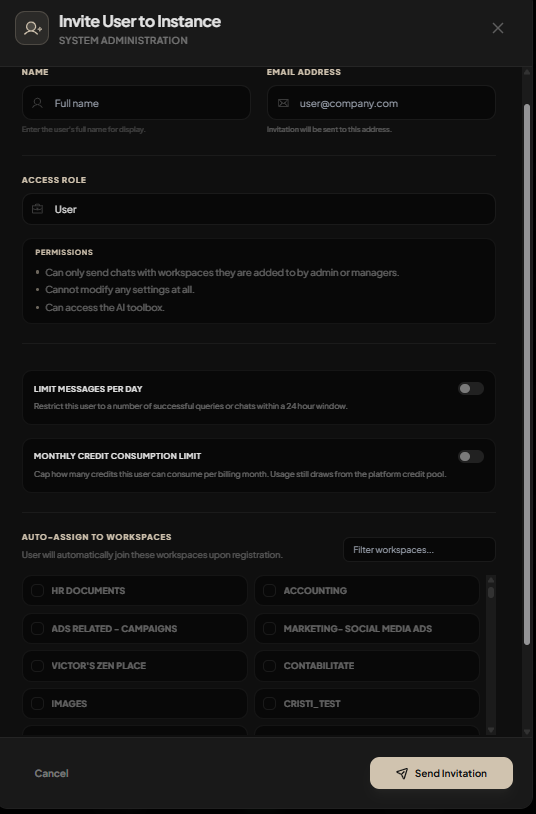
The Invite User flow helps you add new people to DIMA . You can enter user details, assign an access role, define limits, and decide which workspaces they should join automatically.
This makes onboarding easier while giving you more control over permissions, consumption, and workspace access from the start.
- Name and email: Use these fields to identify the user and send the invitation to the correct email address.
- Access role: Choose the role that determines what the user can do inside the instance.
- Permissions: Review the default permission summary so you understand what the selected role allows.
- Daily message limit: Set a limit for how many chats the user can send in a 24-hour period.
- Monthly credit consumption limit: Restrict how many credits the user can use in one billing month.
- Auto-assign to workspaces: Select one or more workspaces so the user is added automatically after registration.
- Send invitation: Use this button to send the invite and create the user onboarding flow.